
My Squeaker is a tiny little guy. He’s over 20 months old now, and he only recently started wearing 12-to-18 month clothes. So what’s a mom to do when nothing fits in the waist? You know me: Type A personality. Time for a little DIY adjustable waist toddler pants!
Option A: Buy Adjustable Waist in Everything
Only khakis, dressy pants, and jeans come in an adjustable waist. Not practical for the entire wardrobe. Next idea.
Option B: Buy Drawstring Waist in Everything
At first glance, tons of comfy toddler pants have drawstrings! Guess what? Many times, they’re FAUX drawstrings. No dice.
Option C: Roll Down the Waist and Hope for the Best
Squeak is so skinny this hardly ever works. It would suck to go through life feeling like your pants are going to fall down. Even more so because the only job a toddler has is PLAYING. Crawl, climb, run, jump, spin, and repeat. Pause to pull your pants up (in Squeak’s case, it’s ‘cry until someone pulls your pants up for you.’).
The Winner: DIY Adjustable Waist Toddler Pants!
This is what I did, and it’s working beautifully so far. I’m not even good at sewing, and I still figured out how to DIY adjustable waist toddler pants, so you can too.
Here’s what you’ll need:
- 3/4″ buttonhole elastic ($7 on Amazon)
- Fray Check ($5.00 on Amazon when I bought it)
- Buttons (I bought buttons on Amazon, but maybe you’re cool enough to have some on hand)
- Needle and thread (you’ll want thread in the same color as what you’re sewing, so it’s not as visible)
- Seam ripper (tiny scissors just won’t cut it; this best-seller is $5.00 on Amazon)
- Scissors (for cutting thread)
- A crochet hook ($2) or latch hook ($5)
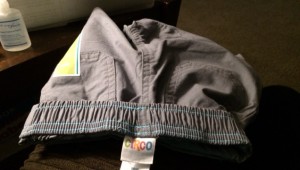
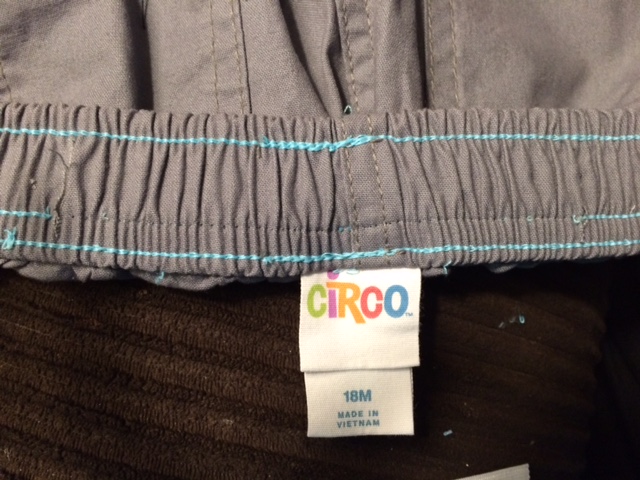
My subject: a pair of Target shorts I bought for Squeak last weekend. Most of these photos will enlarge when you click them, if you want to see the details.

Roll the waistband down so it’s easier to get at while you work.
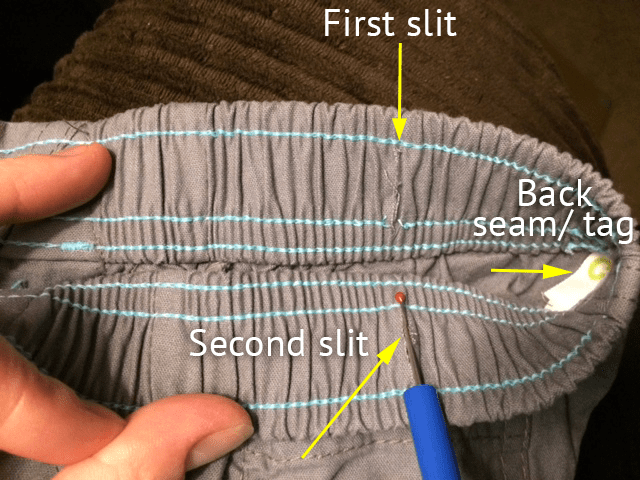
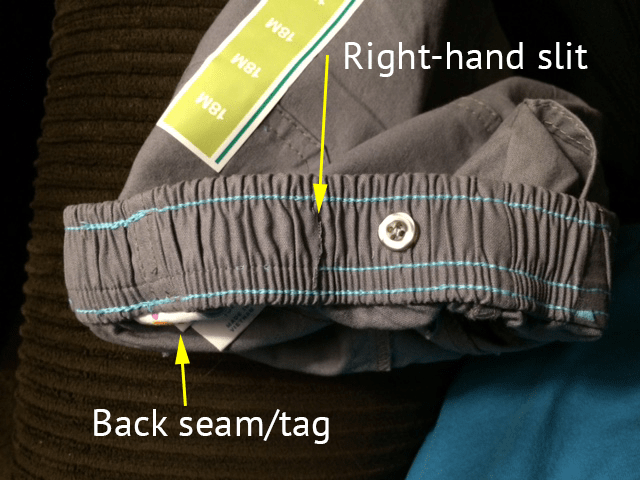
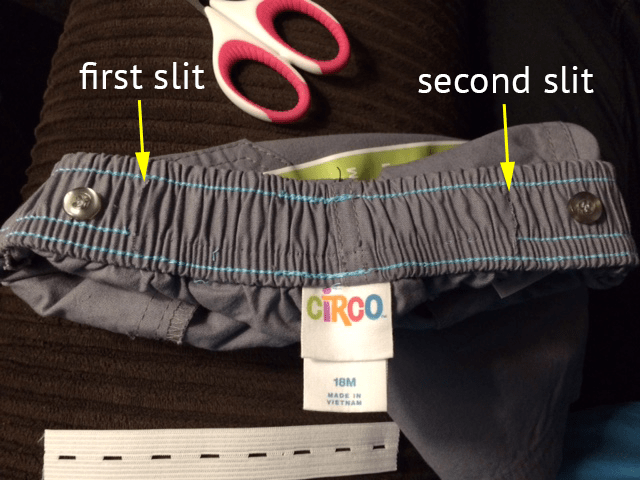
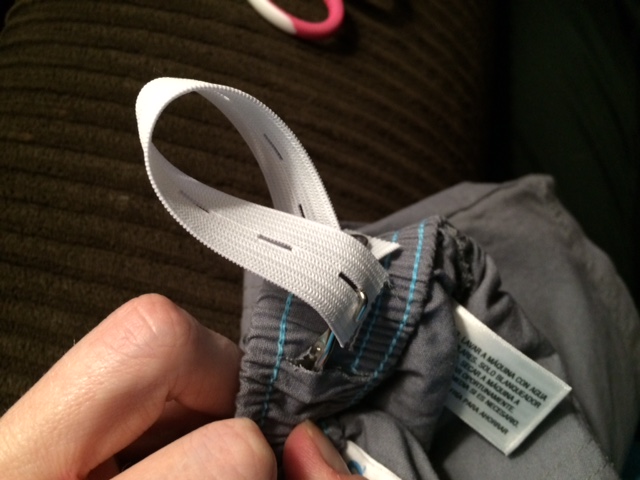
Step 1: Cut a slit in the back of the waistband about 1″-1.5″ away from the side seams.
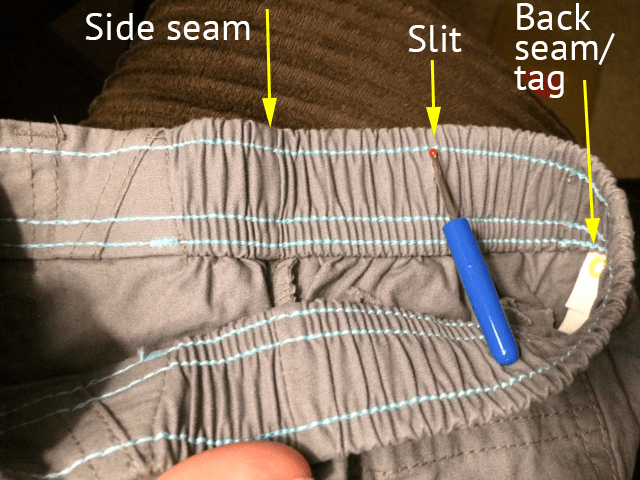
For this particular pair of shorts, I needed to cut through the middle thread. I had to rip that thread out (which you’ll see later) so the elastic could fit through the channel in the waistband.
Step 2: Fold the pants so the two side seams are touching. Then cut an identical slit on the other side.
Step 3: Dab some Fray Check on the edges of the fabric; let dry 15-30 minutes.

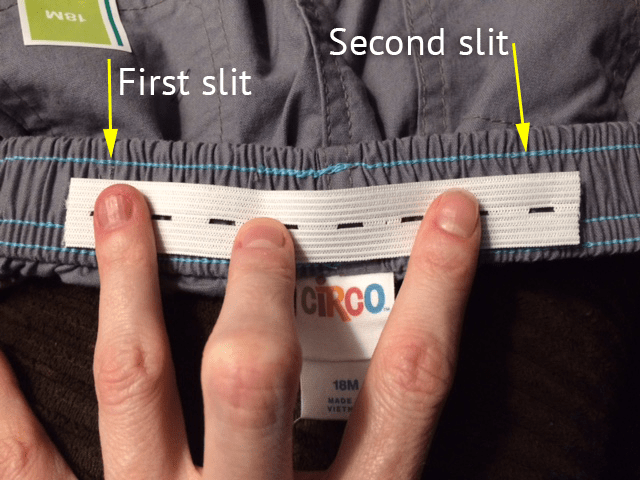
Step 4: Cut a length of buttonhole elastic just wider than the length between the two slits.
Set it aside; you’ll need it in a bit.
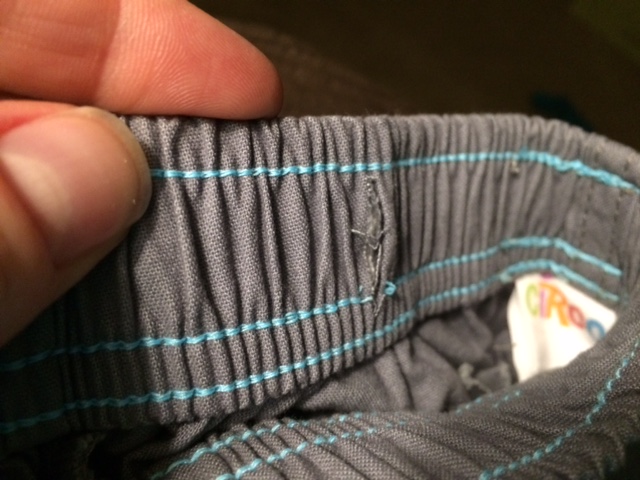
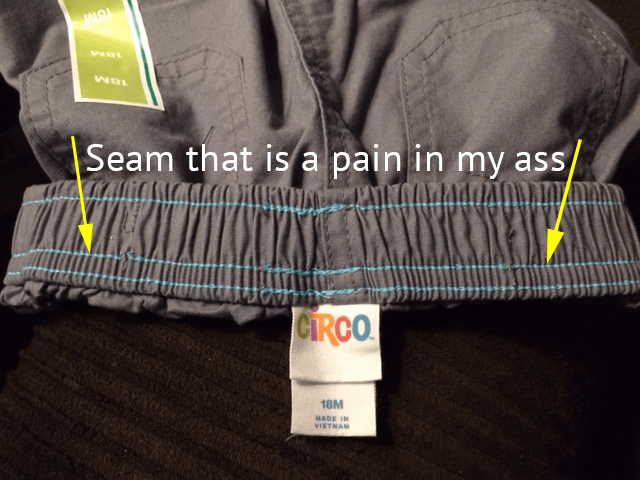
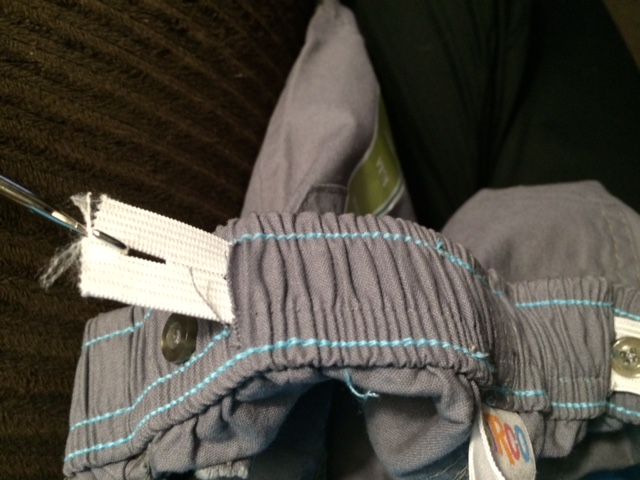
Step 5: Rip out any seams that will impede your elastic from going through the channel in the waistband.
These shorts had a seam sewn that would make slipping the elastic through really difficult. So I used my seam ripper to remove it between the two slits.
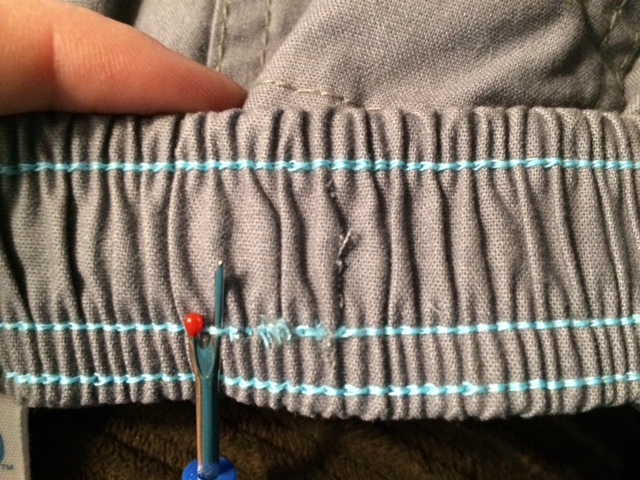
Voila! No more seam:
Use your crochet hook or latch hook and snake it through the channel between the slits. Make sure you can cleanly pass the elastic through, and if you can’t, use your seam ripper to remove thread/seams until you can. I usually have to tear out a few stitches above the tag, but every pair of pants/shorts will vary a bit.
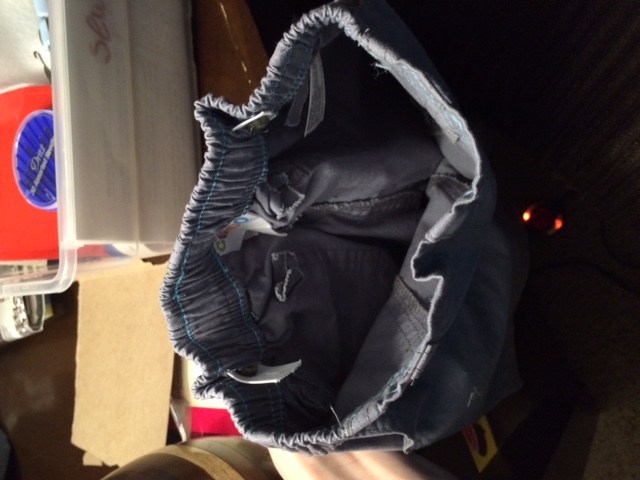
Step 6: Sew buttons halfway between the slits and the side seams.
I’m embarrassed to admit I never really bothered to learn the right way to sew on a button. So I found this button-sewing tutorial enlightening. It’s written for a dude, so you know it’s idiot proof. 😉
It’s best to use thread that blends in with your fabric, since the stitches will be visible on the outside of the waistband.
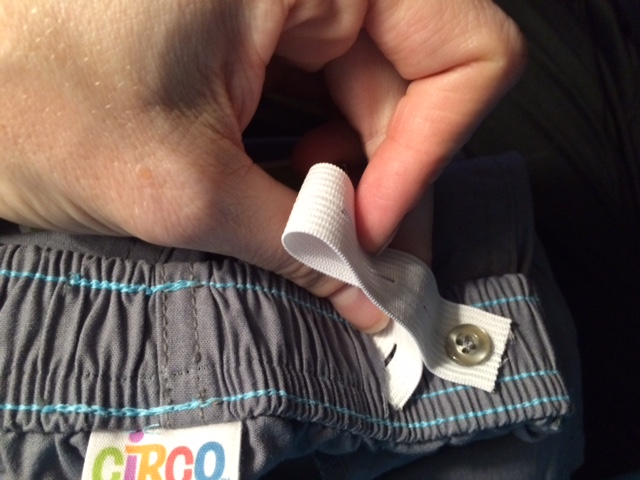
Step 7: Pull the elastic through the channel.
Here’s how I like to do it: button the right side of your buttonhole elastic to the button you sewed. Insert your crochet or latch hook into the left-hand slit until it comes out the right slit. Grab your buttonhole elastic with the hook and pull it through.
Step 8: Adjust as needed for your scrawny kid.

When I put the pants on Squeak this morning, they looked perfectly normal. Happy kid, happy mom!
This tutorial was perfect – thanks!
Brilliant!!
I’m not exaggerating when I say this post has changed my life… I no longer have to ask my mother-in law to adjust my son shorts/trousers while admitting that I have no sewing ability!!
Yeah – dignity restored!!!
Aww, thanks I’m so glad it’s been helpful to you! 🙂
Your blog is so cute and funny! I love your bit by bit instructions! You explain things so well that I never question what I’m doing! I like how you have side remarks (made by a dude) which make all the difference in attempting the tutorial. Keep up the good work! My child is like your squeak and has a tiny waist. I have been doing side snip sewing and back snip sewing but this is even better! Thanks again!
Thank you, NB! I appreciate your kind words. 🙂 Glad the blog is helpful for your tiny-waisted-one!
This is so awesome. My twin 6 year old boys are tall but scrawny. Thank you so much for this step by step tutorial!!! God bless you.
You’re very welcome!
Thank you for sharing this. I need to make the elastic waistband on several pairs of my jeans smaller and I think this method may work!
I’m so happy this is helpful for you!
Love this so much. Your instructions are easy to follow!! I’m excited to try this for my daughters pants. I have no sewing experience but this leaves me feeling very empowered to go for it 🙂
Super understandable!! Thank you for sharing!! Your ‘faux’ comment made my day!!
Why, thank you! I’m glad my twisted sense of humor brought you some laughter. 🙂 Good luck with your adjustable waist project!
Thank you for this tutorial! Both of my children are skinny and I just purchased a bunch of $2 dollar baby pants on clearance, but the waist bands are far too wide for my child. Problem solved thanks to you!
Just found this post, perfect thanks
Hi, I love this tutorial! Only problem is that even though I got the buttonhole elastic and buttons it said to, the elastic sometimes slips off the button. Has anyone else had this problem or know how I can fix it? Thanks!
Hi Carley! If the elastic’s slipping off the button, there are two issues that could be at play — the holes in the elastic are too big or the button’s too small. You could replace the buttons with larger ones, or replace the elastic with a different type that has smaller slits! 🙂 Good luck!