
Since I last checked in—which was nearly a year ago—THE ENTIRE WORLD has changed. How often do you get to say that?
Uffda. I hope I never have to say it again.
When the country shut down for two months, I started working from home full-time (which continues to this day). My kids had the most epic 80s-style summer of their lives, and skipped a half-semester of school. In fall, they started school online, and we all learned what online school is like (spoiler alert: for my family, it SUCKS).
These days, I’m still working at home, and my kids go to school 2.5 days a week (with some fully online interludes when positivity rates spike). My husband, a professional stand-up comedian, is home to manage Zoom school, which is helpful. But there are no activities. Our calendar is blissfully empty.
Still, I don’t like being idle. It feels wrong. So I did what any good overachiever does, and found ways to stay busy over the last 8.5 months! Starting with…
Books, Books, and More Books
I started a journal early in the pandemic, which I abandoned after it became clear this was no short-term thing (I’m great at starting things, not so good at finishing). In it, I logged the books I was reading, and even after I stopped journaling, I continued logging my books.
Pre-pandemic, I might have read one book a month. I prefer to read before bed, and because I was waking at 4:30am on weekdays, “reading time” was cut so I could get 7 hours of sleep.
During the pandemic, I switched to a 6:00 AM gym class, which meant waking up an hour later. That extra hour I gained at bedtime = READING! Yay!
Best of all, our local library found a clever way to stay open. They offered “Library Hop” service, where they’d select books for you to pick up curbside. I put in my first request for “family dramas” soon after lockdown started (Book #1: Where the Crawdads Sing), and I was off to the races.
I read:
- 2 books in March
- 7 in April
- 3 in May
- 0 in June (no idea what happened there)
- 8 in July
- 6 in August
- 4 in September
- 7 in October
- 6 in November, and
- 2 so far this month
That’s a total of 45 books in 270 days, or about one book every 6 days.
Sometimes I ask for thrillers, but when I get sick of that genre, I always revert to family dramas. And aside from that one time I received a lesbian love story, the librarians take it seriously and pick some great books.
My favorites: A Good Neighborhood (this one made NPR’s best books of 2020 list, it’s fantastic), Olive Kitteridge, The Marsh King’s Daughter, Little Eyes (another NPR pick; weird, but good), The Talented Miss Farwell, The Light Between Oceans, and The Book of Lost Friends, and Ask Again, Yes. All family dramas.
The Bathroom Remodel
You know those projects that seem easy and straightforward, but once you get into them, they’re a HUGE deal with tons of curveballs? This was one of thoseprojects.
The side of my vanity had started to rot thanks to two kids who LOVE splashing in the tub. Water soaked up into the side of the vanity, and it looked like shit (see below). So I decided to give the bathroom a mini-remodel.

The vanity was 12 years old and not worth salvaging after the rot became super obvious.
And as one does, when you need a new vanity, you might as well tear up the floors while you’re at it, and if you’re going to do the floors, you might as well get new trim, too. My projects seem to snowball like that. So here she is, the mini bathroom remodel!


The mini-remodel required me to:
- Remove the vanity (without damaging the vanity top and faucet, which I reused)
- Remove the toilet
- Tear out the vinyl sheet flooring and subfloor
- Remove all trim and baseboards
- Lay new vinyl plank flooring
- Install the new vanity and reinstall the countertop and faucet
- Re-seat the toilet
- Prime, paint, and install new trim and baseboards
It was supposed to be so easy.
(Famous last words.)
The curveballs:
- The new vanity was 4″ taller than the old one, which meant we had to completely rebuild the P-trap under the sink so the drain pipe could reach. My plumber friend FaceTimed me through the steps, bless his heart. Afterward, I was sweaty and tired and so friggin’ proud of myself.
- I had to re-seat the toilet twice, after f***ing it up the first time.
- My old vanity mirror would no longer work, so I bought a new vanity mirror and framed it. This unexpected expense happened because there wasn’t enough room for the old mirror due to the increased height of the vanity. (Damn you, four inches!! *shakes fist*) I bought a plain mirror and framed it myself.
- Trim, trim, and more trim. I ended up at Lowe’s eleventy-billion times, because I didn’t yet own a miter saw (I’ve fixed that problem since) and was cutting the trim WITH A HAND SAW and a miter box. I kept screwing up my cuts, requiring more trim, which then required priming and painting. Urgh.
- Once the vanity was in, I had to cut a large notch in the bottom drawer to accommodate the water lines, which came up from the floor. The vanity was designed for the water lines to come in from the back wall. It’s not pretty, but it’s effective. I’m not including a picture because it’s not my best work, LOL!
- Finally, the transition from the vinyl to the hallway carpet required multiple attempts, too. But I got it done.
The flooring was hard, but after the first two planks, it was smooth sailing. I borrowed a vinyl cutter, and my jigsaw and a holesaw/paddle bits were super helpful, too. The vinyl flooring installation kit from Lowe’s (about $15) is SO worth it. That tapping block and pull bar were a godsend.
I completely and totally love my mini-remodeled bathroom, and best of all, I hammered every nail and laid every plank all by myself. Thank goodness for friends, FaceTime, and YouTube.
Bathroom Project Budget
My budget for the project was $545, and it ended up at $660, or 21% over budget, thanks to the damn curveballs. Most of my overage was the mirror and trim; the remainder was plumbing supplies to rebuild the P-trap.
Lydia the Woodworker
The bathroom remodel—specifically, the frame around the mirror—required that I buy tools to do some joinery.
(Joinery is basically a fancy term for joining two pieces of wood together without visible screws or nails. There are several types, but my favorite is pocket joinery, which uses a tool called a Kreg Jig.)
Having the tools to do joinery gave me the bug to do some woodworking, so I found a secondhand miter saw on Facebook Marketplace. I was ready for a project!
I started by building a frame for another bathroom mirror, this time the master bath. Easy-peasy.
The second project surfaced in August. My children would be going back to school completely online, through at least early December, and they’d need desks.
I wanted storage in the desk to help with my anti-clutter OCD, so I used this plan for the desk and this plan for the chair. (I lengthened the legs of the desk to accommodate the slightly taller chair my son needed plus the memory foam I added on the seat. Be sure to factor your kiddo’s height into the chair and desk height!)
I added an Easter egg under the desktop: his favorite animal! I found a picture online and drew it by hand, then filled it in with paint markers and sealed the hell out of it with polyurethane. My daughter’s Easter egg was a flamingo. These desks have held up really well so far and they’re super cute, so I don’t even mind having them in my living room!


After the desks were built, I still had an itch to make stuff. I had discovered how satisfying it was to actually create something with my bare hands after a long day at a computer screen.
Bench with Shoe Storage
My next project was an A-frame bench with shoe storage, which I built from these plans from Anika’s DIY Life. I promised to build my sister one of these, but now the weather has turned cold, so I’ll build hers when it warms up in the spring. I really do love it, though, and it was a snap to build. I banged this out in one day!

Wood + Metal Jewelry Holder
I also dreamed up a couple of scrap wood projects, including one to house my ever-growing jewelry collection. Smooshing it into a jewelry box just wasn’t working anymore. I found a plan online for a wood jewelry holder similar to the one I ended up building, but it called for wooden dowels. The dowels were just glued on, though, and I knew that wouldn’t cut it.
I found metal clips to secure each dowel, but quickly realized how goofy it would look if the clips were shiny metal and the rest of it was wood. Lowe’s had several options for metal rods; the aluminum 1/4″ rods were lightest and easy to cut with a hacksaw.
I cut the scrap wood piece to 18″ with a 30-degree angle on the ends (yay, miter saw!), then sanded and stained it. Next, I cut the aluminum rods to size (Pro tip: use concrete as a sanding block after cutting the rods, to smooth out those super sharp edges—thanks Dad for the tip!). I used 1/4″ metal clips from the plumbing aisle to secure the rods to the board.
Boom: wood and metal jewelry holder. I really, really love it.

The Headband Holder
I have a problem with JUNK bands. They’re my favorite to wear while working out, and apparently I can’t stop buying them. Over four years I’ve amassed 17 of them. Oops. When I repainted the bathroom recently, I removed the towel bar above the toilet because we never use it. But in doing so, I eliminated my headband storage. I solved that problem with a piece of scrap wood and some cup hooks! It’s not beautiful, but it gets the job done. 🙂
Fun fact: It’s made from the other end of the same scrap piece as my jewelry holder!

Sewing
Both my grandmothers were quiltmakers, and when the pandemic gave me extra free time, I decided to become more proficient at using my Elna Super circa 1972 sewing machine.
French Seam Pillowcase
My friend Sophie loaned me a beginning sewist’s guidebook, and I made a pretty sweet pillowcase for my daughter, including a French seam! Ooh, FANCY!
I abandoned my sewing when the weather turned nice, but I plan to pick it back up soon because, winter. I still have the fabric to make another pillowcase as well as an apron.


Panel Track Blinds: New Panels
Back in 2008, when we moved in, I bought a set of panel track blinds from JCPenney. If you don’t know what panel tracks are, check them out below.

Poopy brown. Blech. Also spattered with about 8 years’ worth of kid-flung applesauce and smoothies.

Ignore the weird red bag hanging from the curtain rod. I was just getting it off the table for the cleaning lady.
The brown panels were all fine and good until we repainted our walls 10 months ago, going from beige to gray. I’ve spent all of those months trying to figure out how to replace these panels, because the company that made them went out of business.
Finally I said ‘screw it’ and started looking for fabric to sew my own panels. I bought some samples and chose this Phifertex fabric from Sailrite, a vinyl mesh that’s strong enough to support the weight of a human. A bit of overkill, but whatevs.
I cut the fabric to size using an existing panel as a guide. I removed the Velcro and the weighted bar at the bottom of each panel, again so I could reuse them in the new panels. Add some heavy-duty thread and I was off to the races! As long as you don’t look too closely at my sewing (straight lines are overrated), the new panels look pretty sweet. I love the color I chose (which my friend helped me pick, thanks Abby!).

The new panels block slightly more light than the old, but that’s fine by me. They block the sun when needed, and that’s not very often.

We keep these closed only at night, because my husband thinks there are oodles of rapists and murderers out there waiting for an opportunity to peek into our windows. He’s weird.
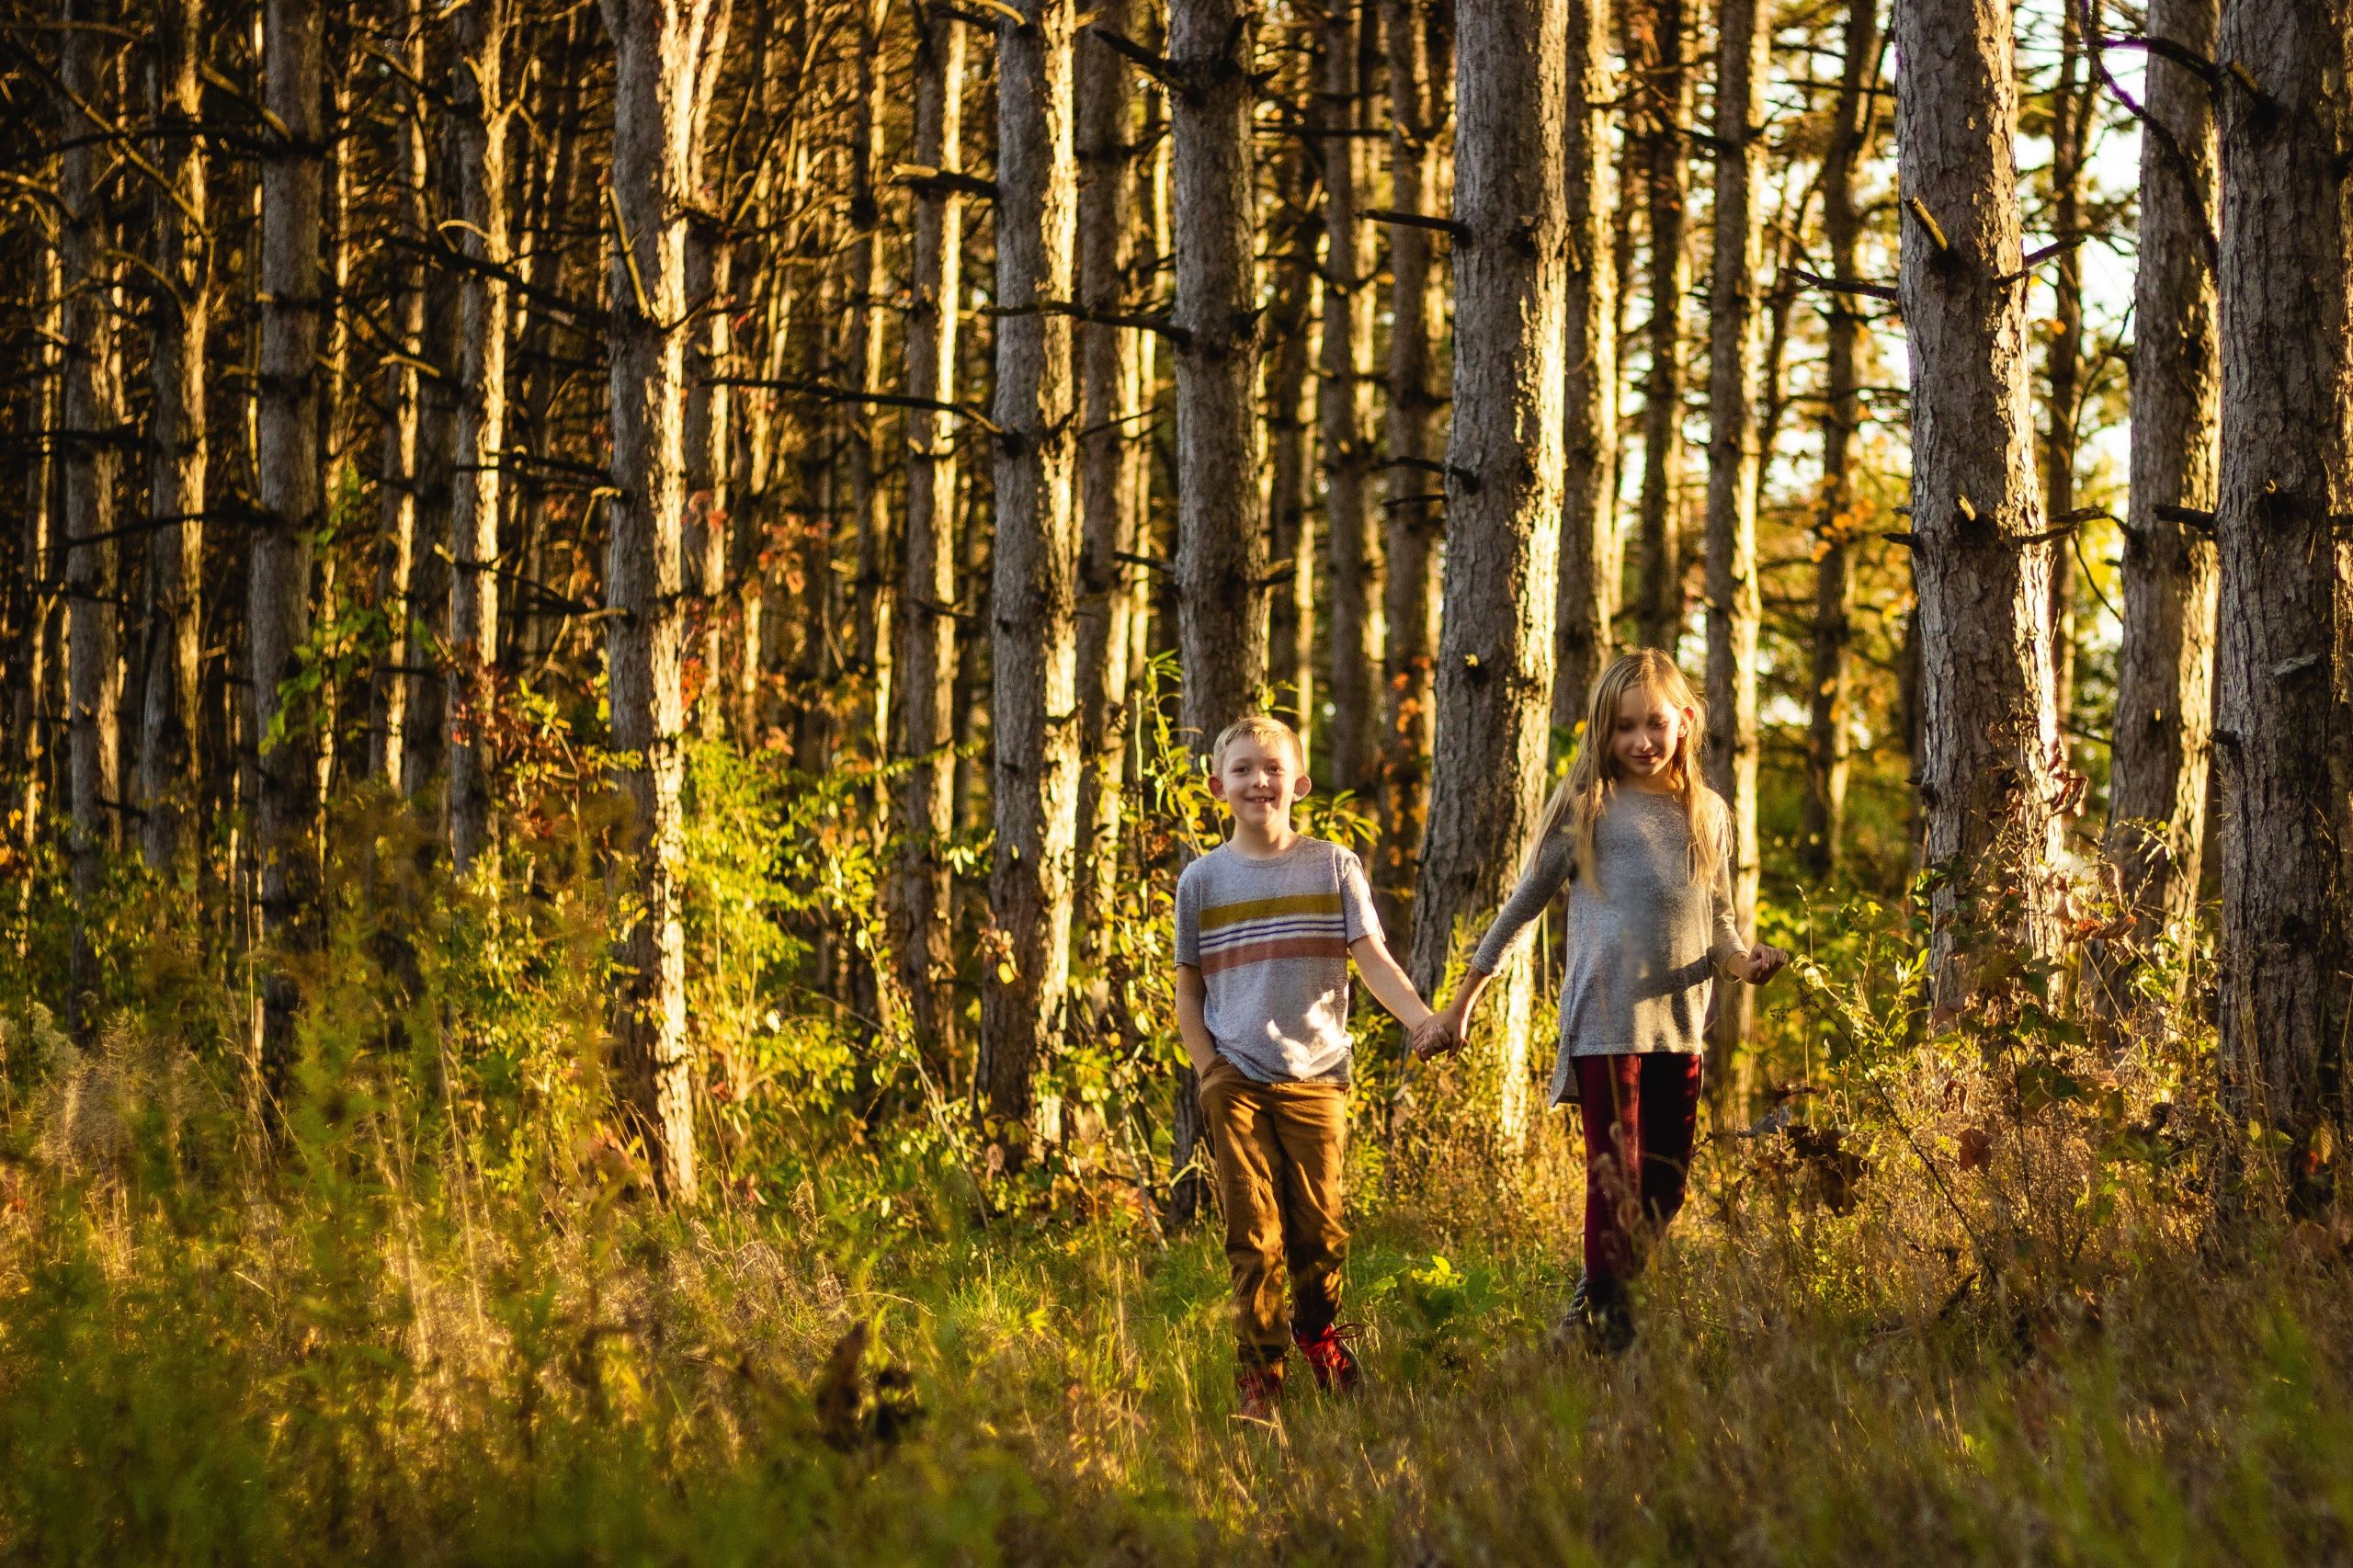
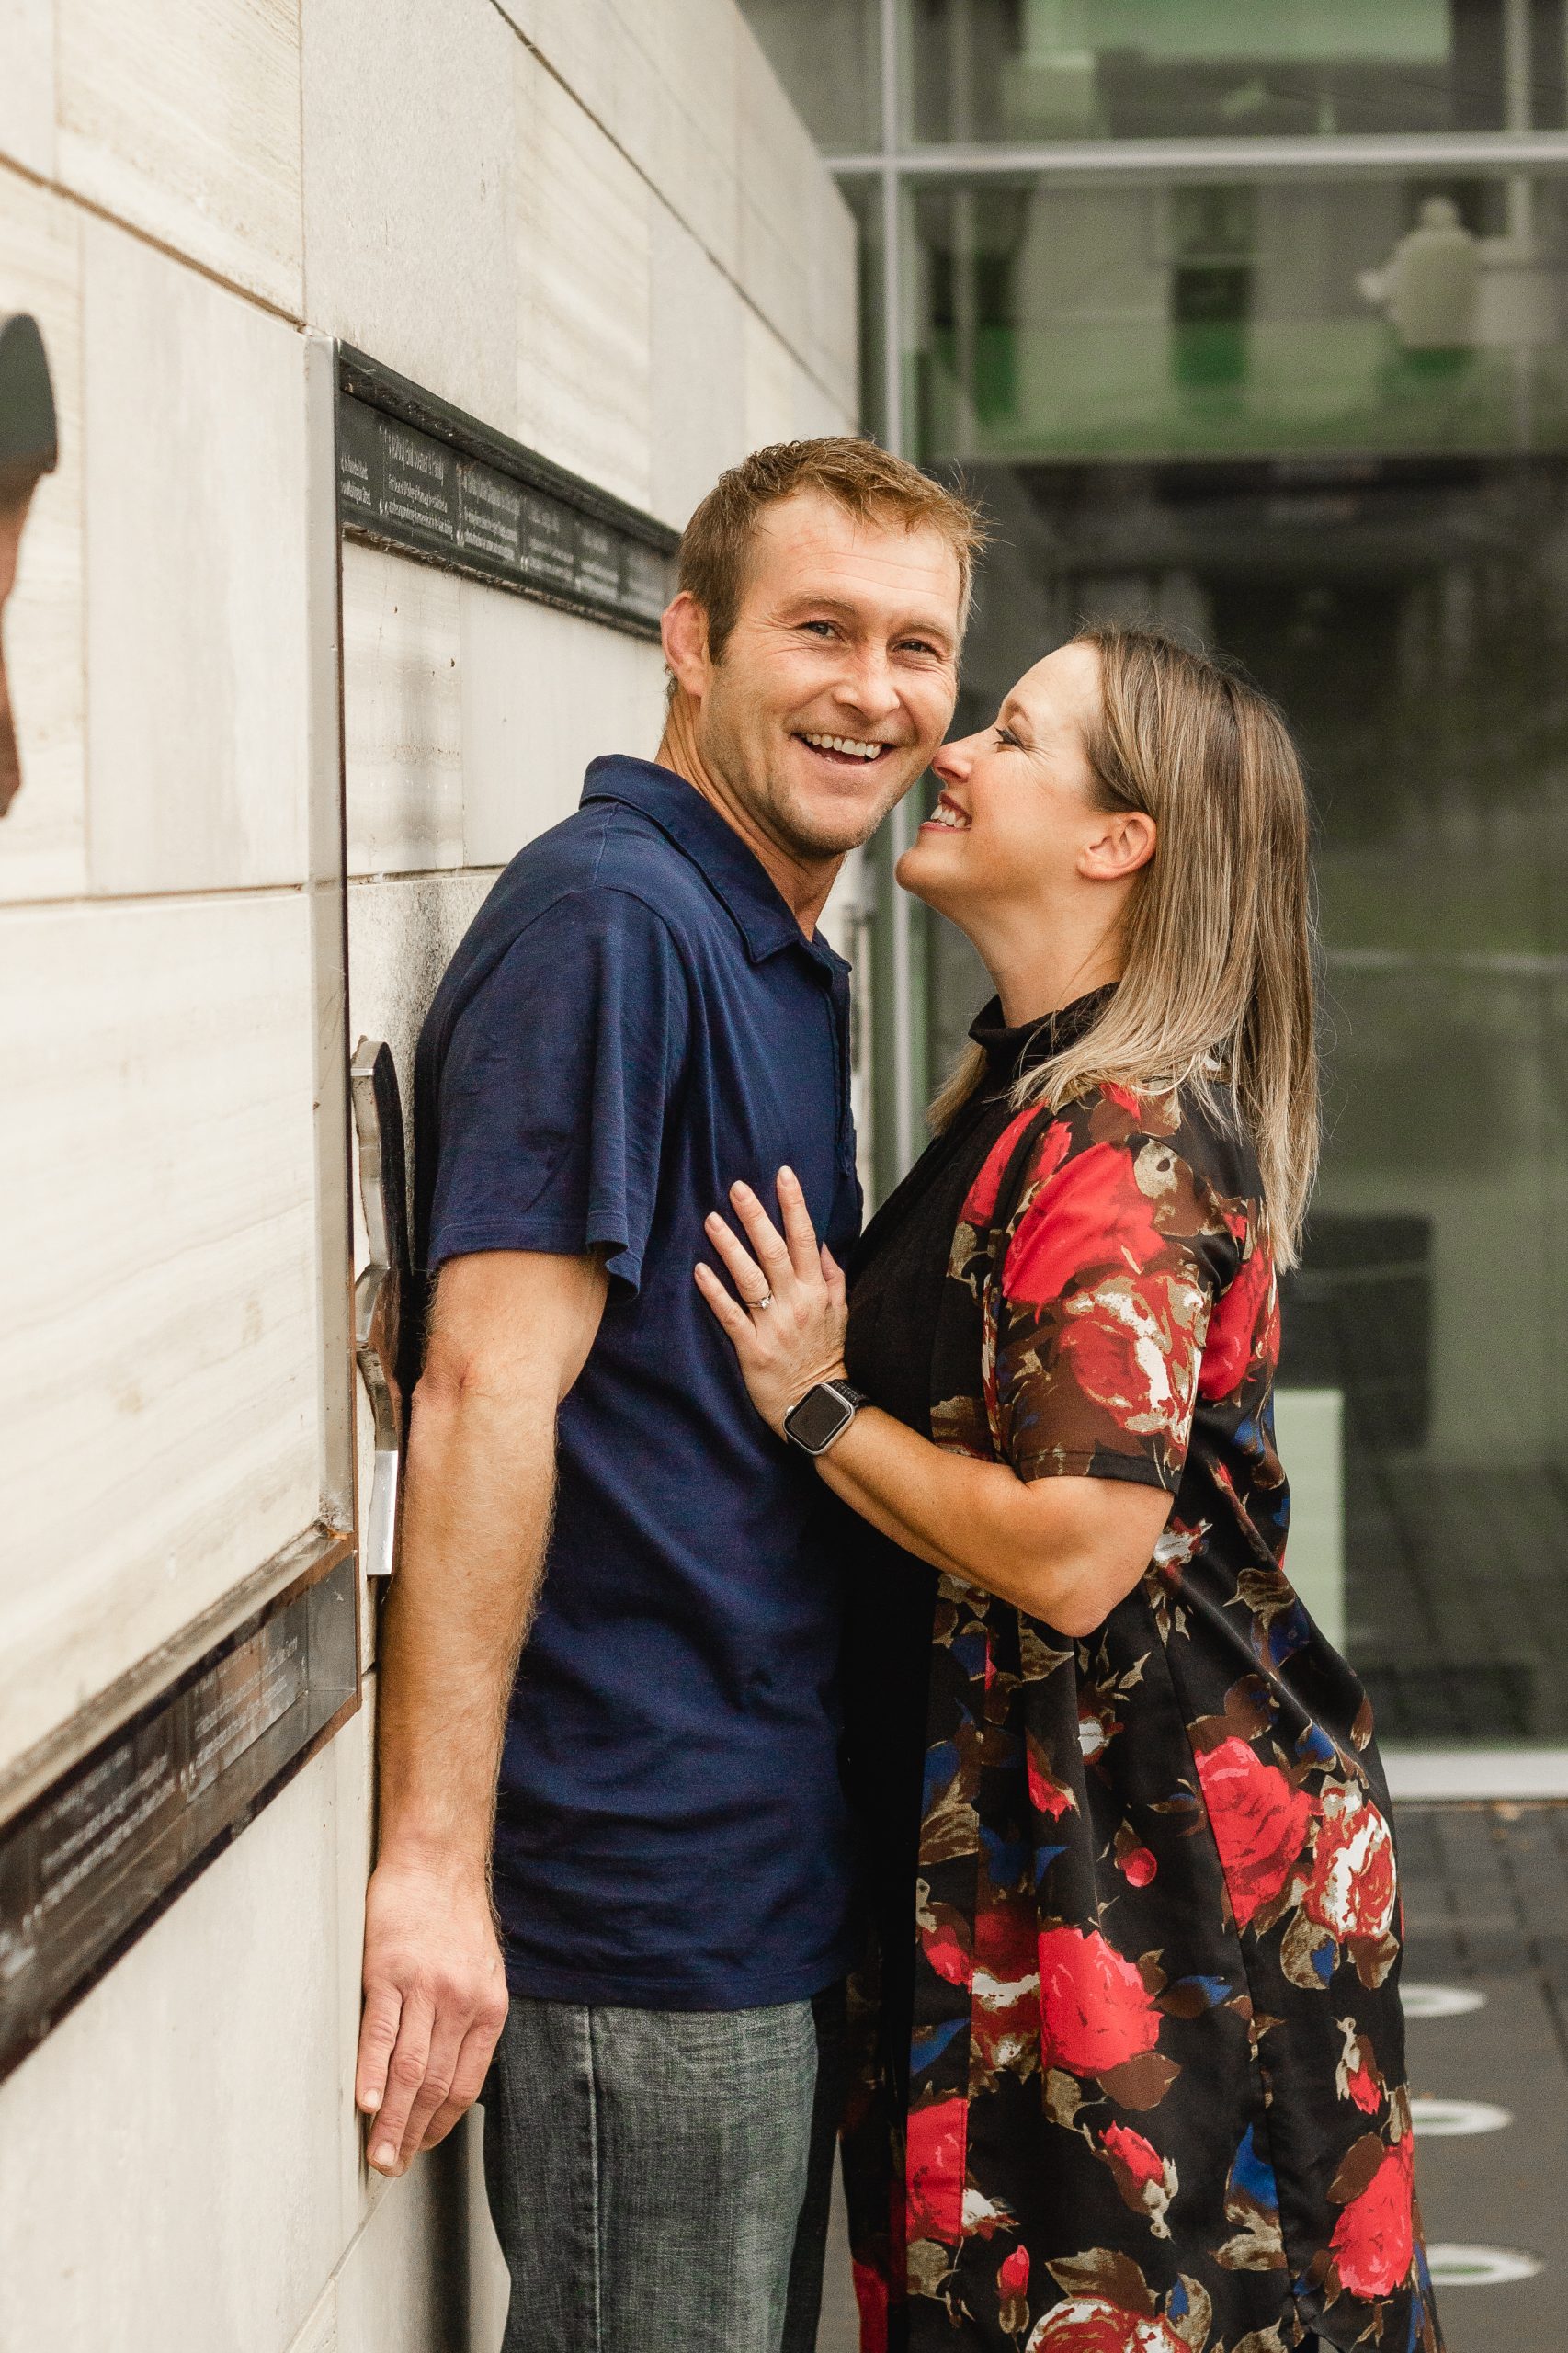
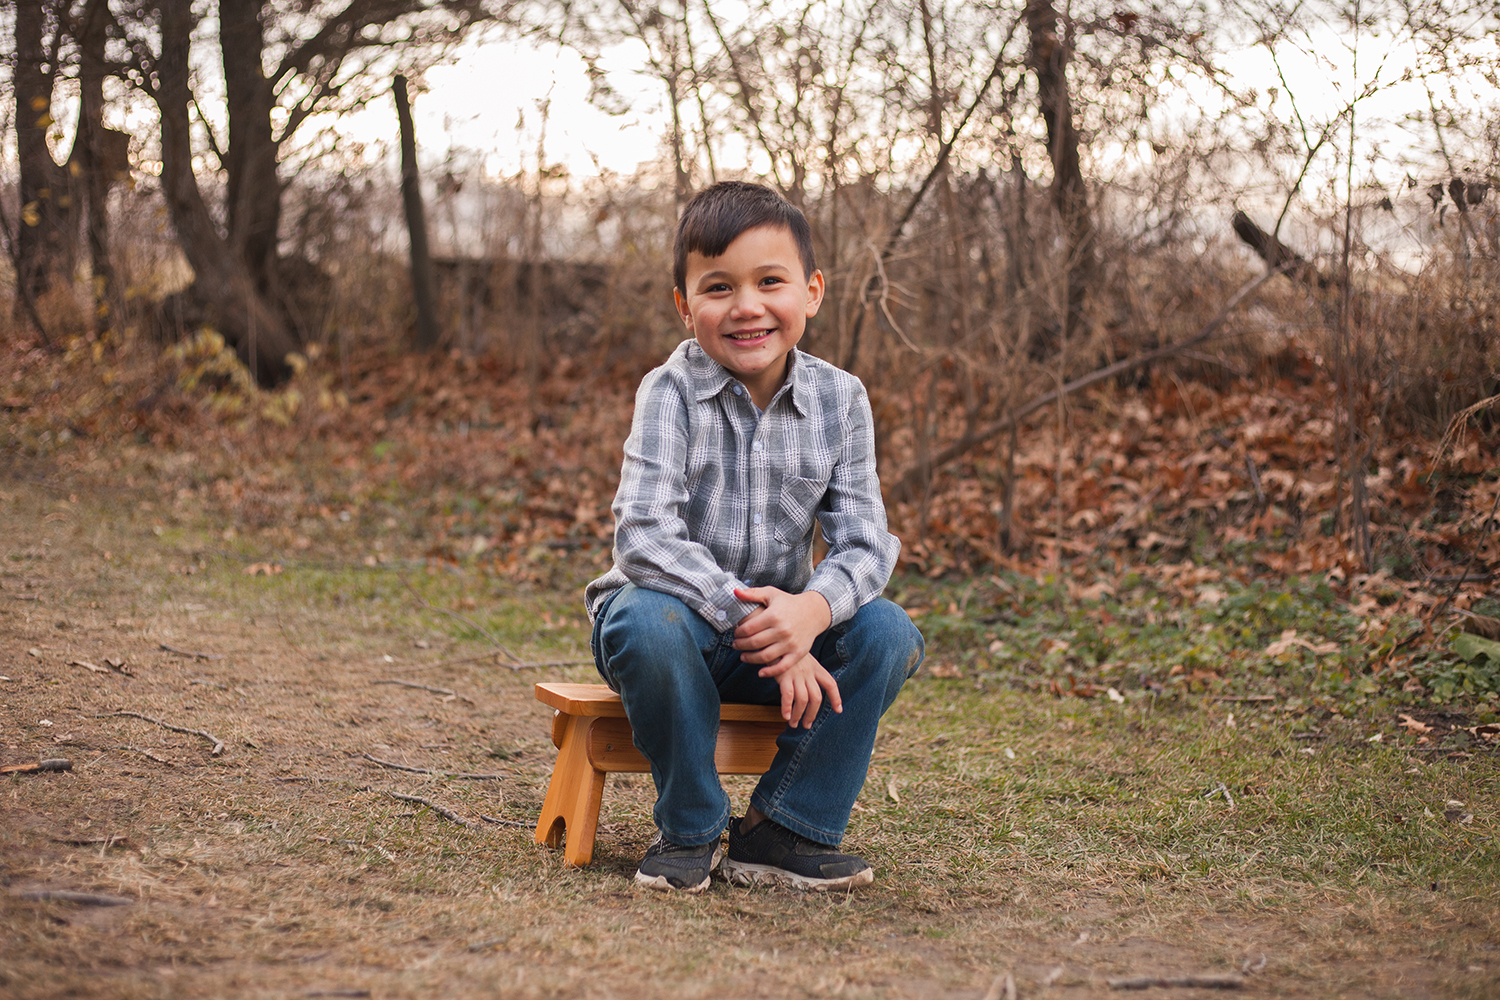
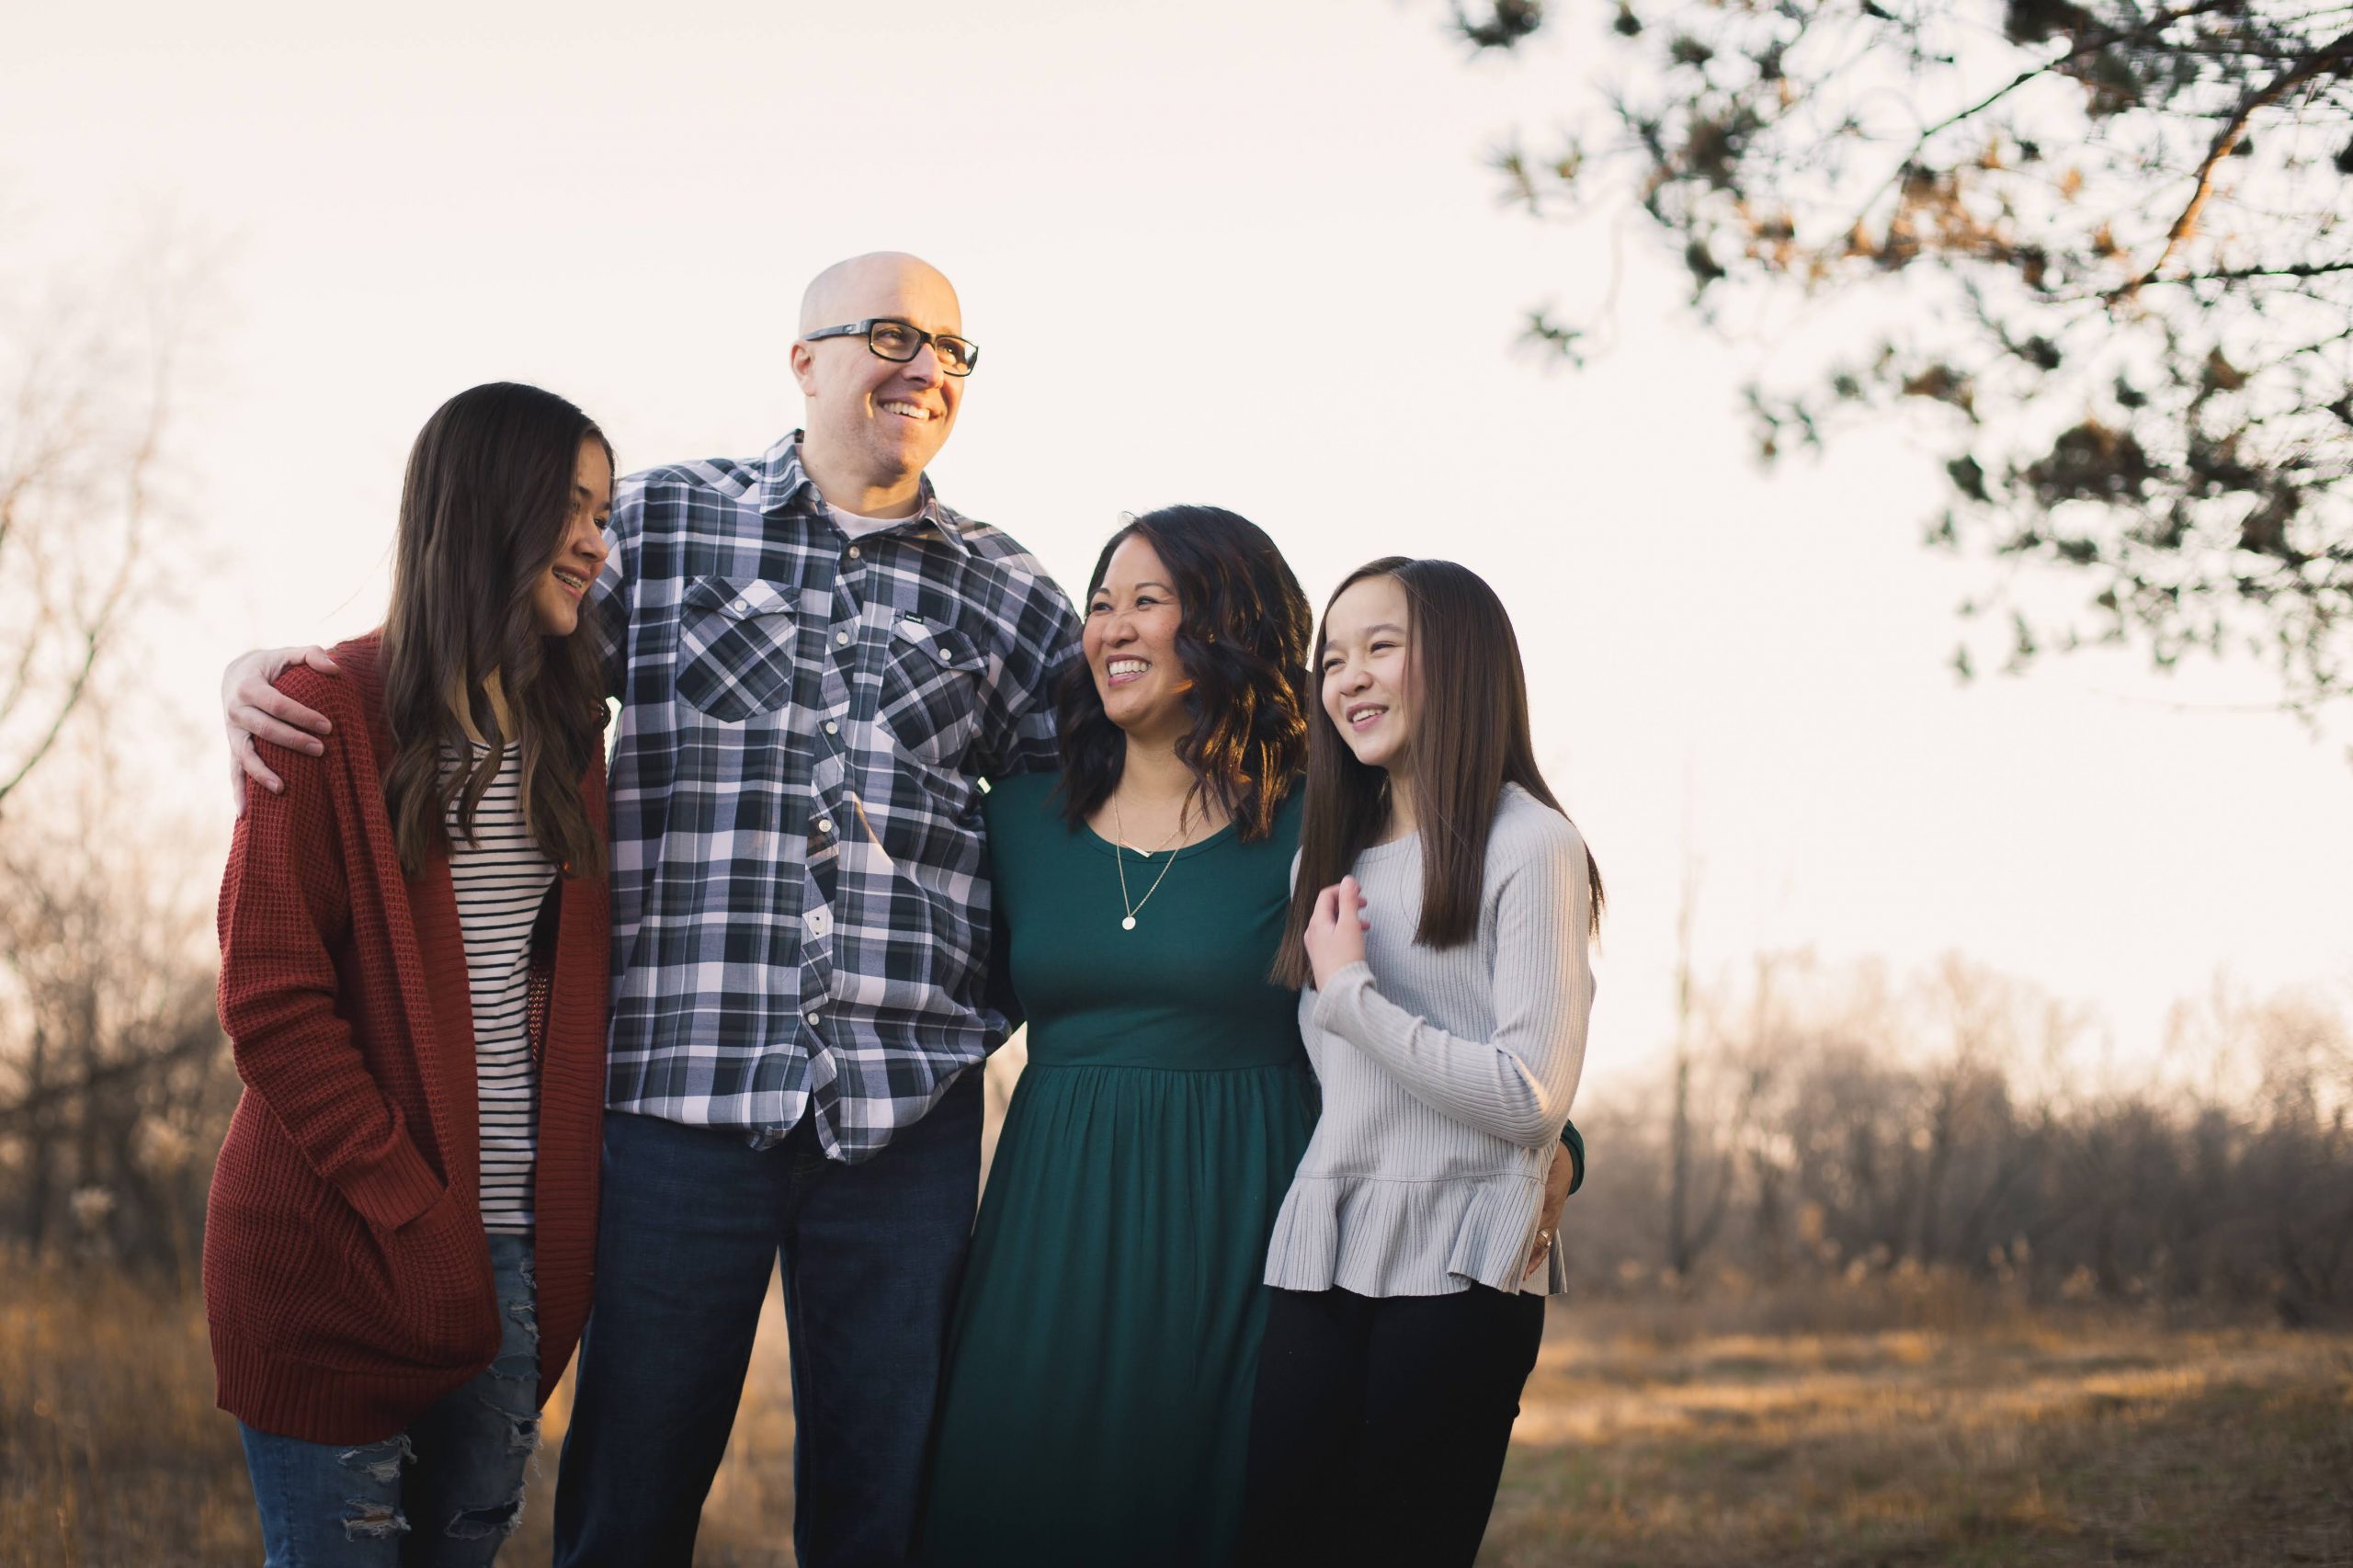
Family Photography
This one totally happened by accident, but it’s the 2020 hobby I’m proudest of.
Back in August, a good friend asked if I’d use my “fancy” camera to take some photos for their Christmas card. At first I said no, because I didn’t think I could do it. But she assured me they weren’t picky. “Okay, but keep your expectations low,” I told them. I found a pretty spot, brushed up with a few online photography tutorials, and gave it a go.
I was super nervous before (and during) the shoot. Like, butterflies in my stomach, about to give a speech in public, I-might-throw-up nervous. I really really wanted to do a good job.
And you know what? The pictures didn’t suck as much as I thought they would. So I offered to take pictures for three more close friends, all of whom said yes. And those pictures were even better!
I was already reasonably well-versed in Photoshop, so head-swapping was NBD. I learned Lightroom on the fly to color-correct and get the look and feel I liked. Anytime I was stumped, I googled it. Luckily I have some good friends who are photographers (thanks Mindy and Liz!) and were patient and helpful with my incessant questions about camera settings, locations, and more.
I been keeping busy ever since. So far I’ve only photographed my friends, but I’ve done over 20 photo shoots! I also upgraded my camera, from a Canon T3i to a 5D Mark II, which I bought secondhand. I upgraded my lens, and so far I’m loving the results. I’ve got my eye on a Canon R6 mirrorless… but it’ll be a while before I can save enough money for it.
I still get crazy nervous before I take pictures. I have a major case of impostor syndrome. I know I’m new to this, and have a lot to learn (particularly about how to set my subjects at ease, and how to coax genuine moments from them rather than generic poses). But I’ve connected with a couple of area photogs who are open to having me shadow them, so I can get better.
I learn something every time I shoot, and most importantly, I still enjoy both taking photos and editing. I’m careful not to do too much, or the fun will be sucked out of it.
I included some of my favorites below. My first shoots are up top, my most recent at the bottom. I’ve done almost all families so far, one professional headshot, one pregnancy announcement, and one baby shoot. In the spring I’m planning to try other types of subjects, too! I’m super excited to branch out.


Family Photography Update: March 2022
This “hobby” has become more than a hobby, I’ve turned it into a small business! Yay!
You can find my family photography over at Apollo & Ivy Photography.
And so on…
I didn’t list the little bitty projects I’ve taken on, because it would be super boring, but I also painted a bathroom and a bedroom, as well as the ceilings in our main living area (omg I hate painting ceilings!).
I built a website for my HOA, which was a lot of fun (I know, I’m such a dork). I also learned how to build dashboards in Einstein Analytics (aka Tableau CRM) for my job, which I also really enjoyed.
My current project, besides the occasional photo shoot, is editing my husband’s new book. I’ll share more about that exciting development later!
And while I didn’t do the work, we also had a huge project that resulted from two natural disasters in 2020 (a massive hailstorm in July followed by the legendary derecho in August). Long story short, we were able to make some pretty sweet home improvements in addition to getting a new roof. Yay!
All in all, I guess you can say I stayed busy. Now I’m off to my next project: swapping out all of the light switches in the house with rocker switches.
#dork
Featured image courtesy of Sara Kurfeß on Unsplash
0 Comments